Google Indexing API Setup
1. Steps to Create an Indexing API Project
1.1. Go to Google Cloud Platform
Start by heading over to the Google Cloud Platform directly from here.
1.2. Create a New Project
Ensure that you’re creating a new Indexing API project by clicking the Create Project option.
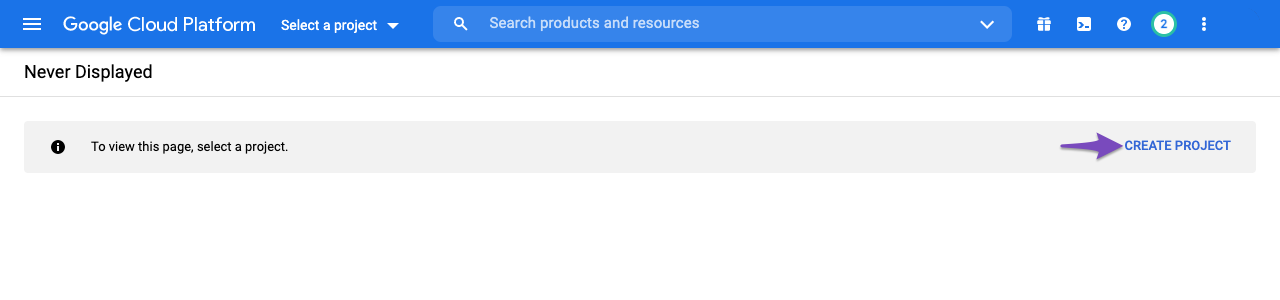
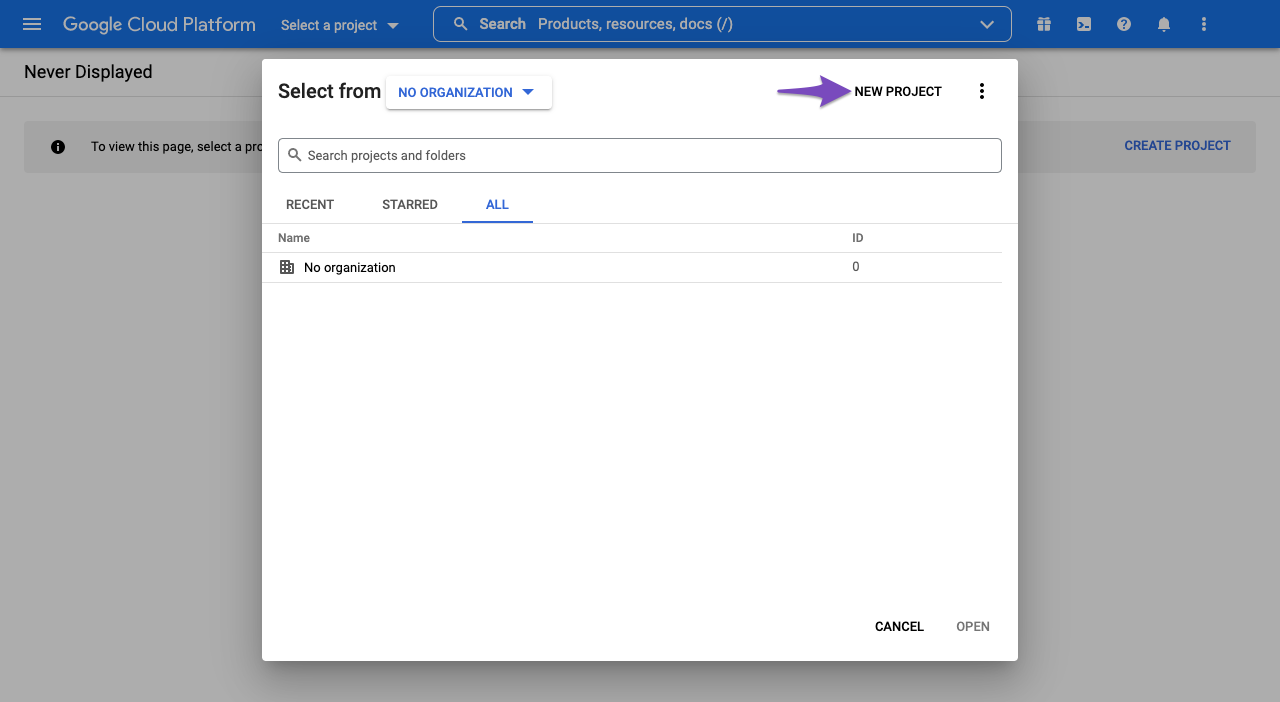
Alternatively, you can click the Select a project drop-down and choose New Project from the popup that appears on the screen.
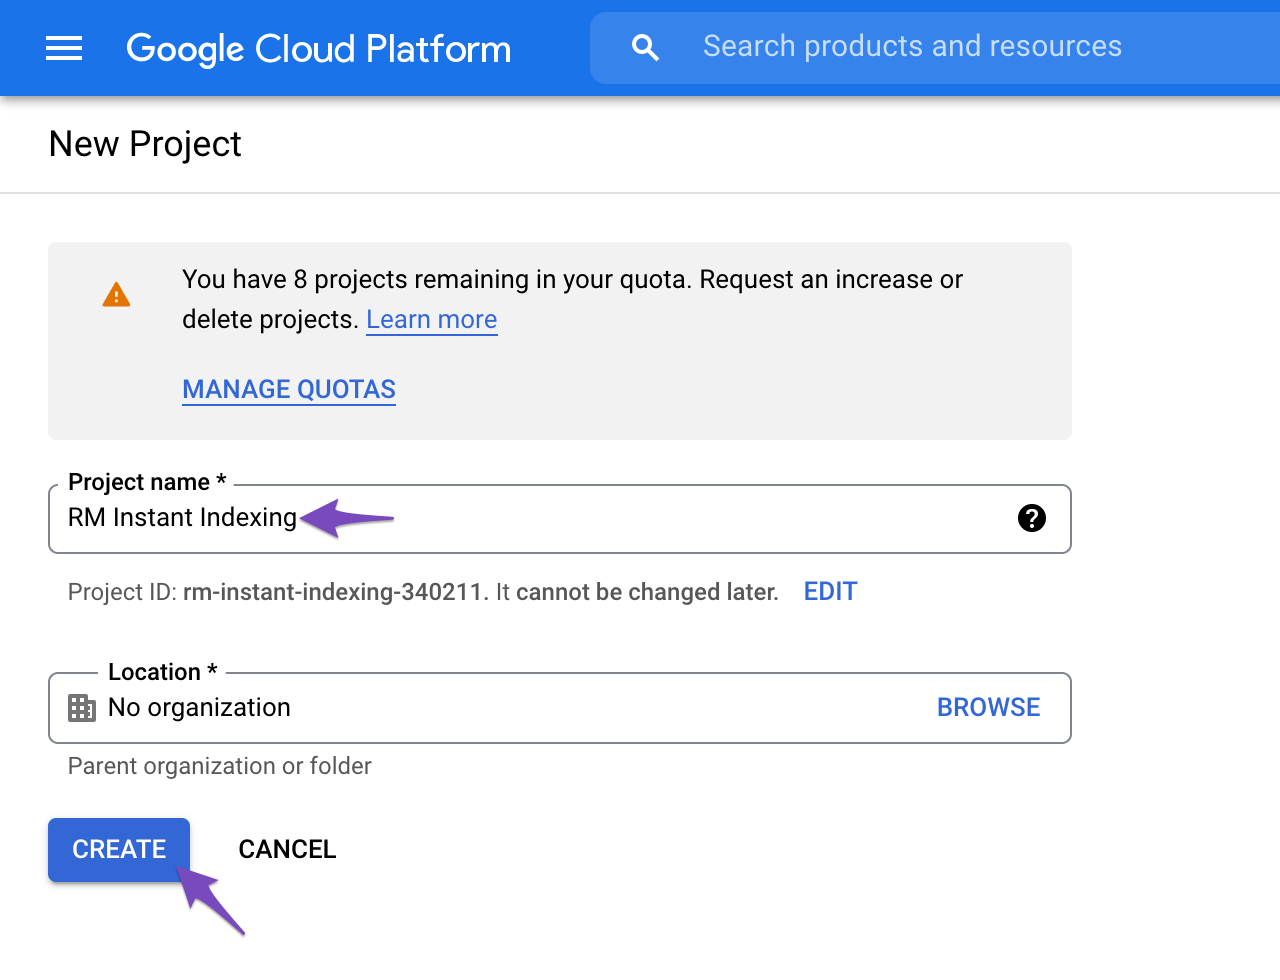
In the next screen, enter a project name that you can recognize later. And then click Create.
1.3. Enable Access to API
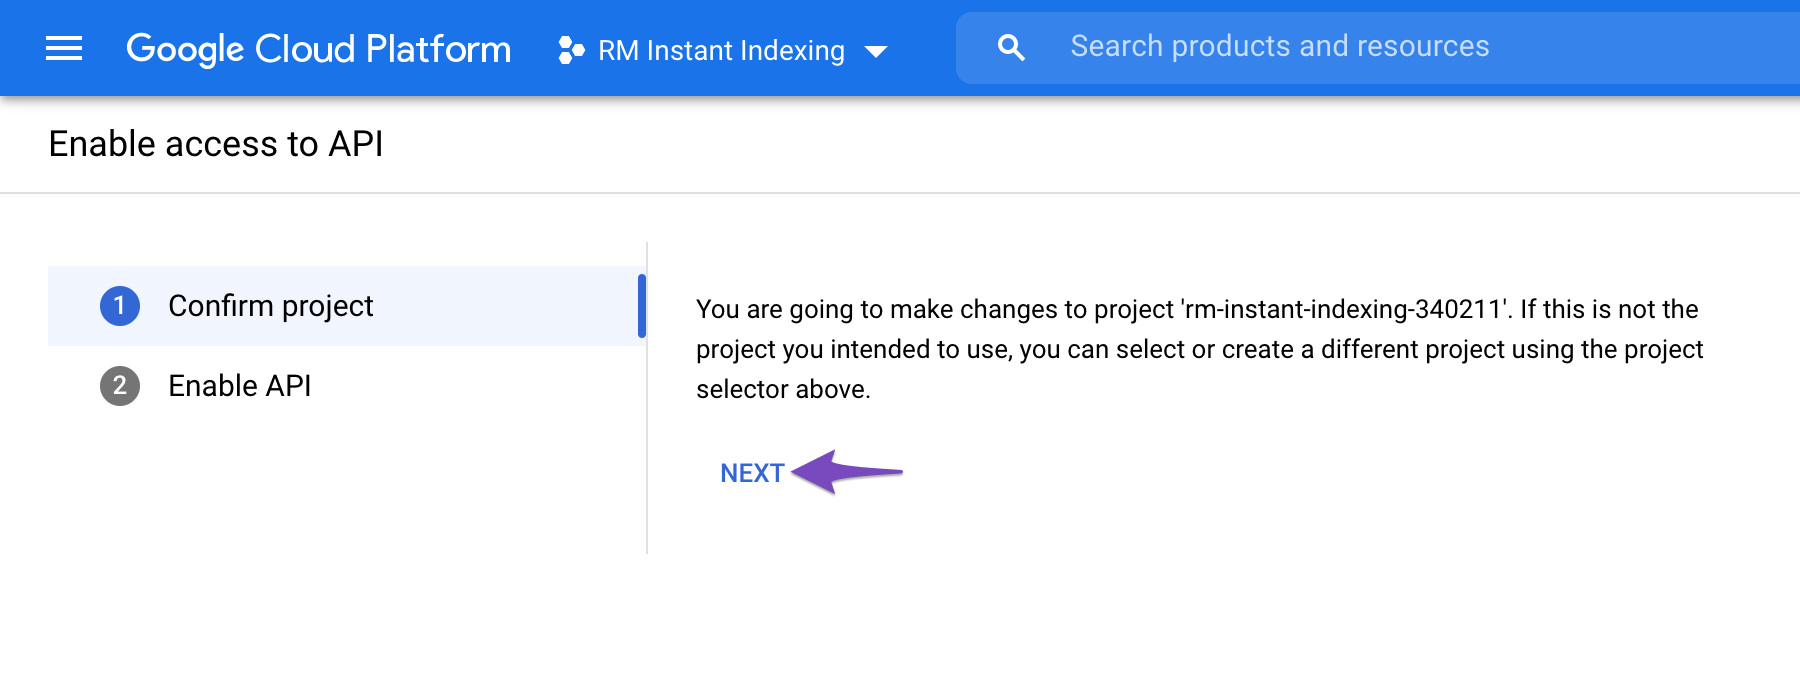
Once you create the project, you’d need to enable the project to access the API. In the next step, you’d see a screen as shown below. Confirm if the selected project is the one that we’ve created for Instant Indexing API, else select the drop-down at the top to change the project. Once you’ve selected the project, click Next.
In the next step, click the Enable option to enable the project to access the Instant Indexing API.
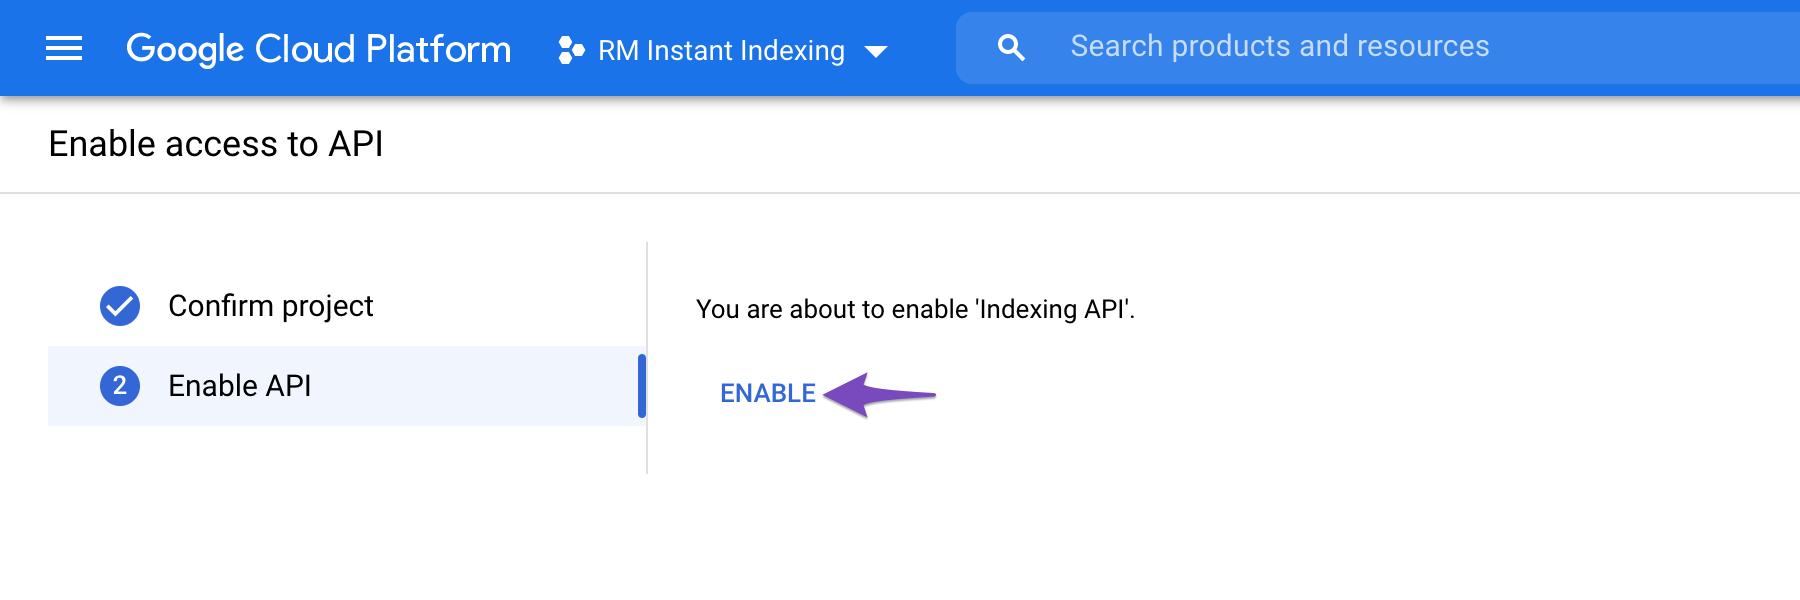
Once you’ve enabled it, you can close this tab.
2. Steps to Create Service Account
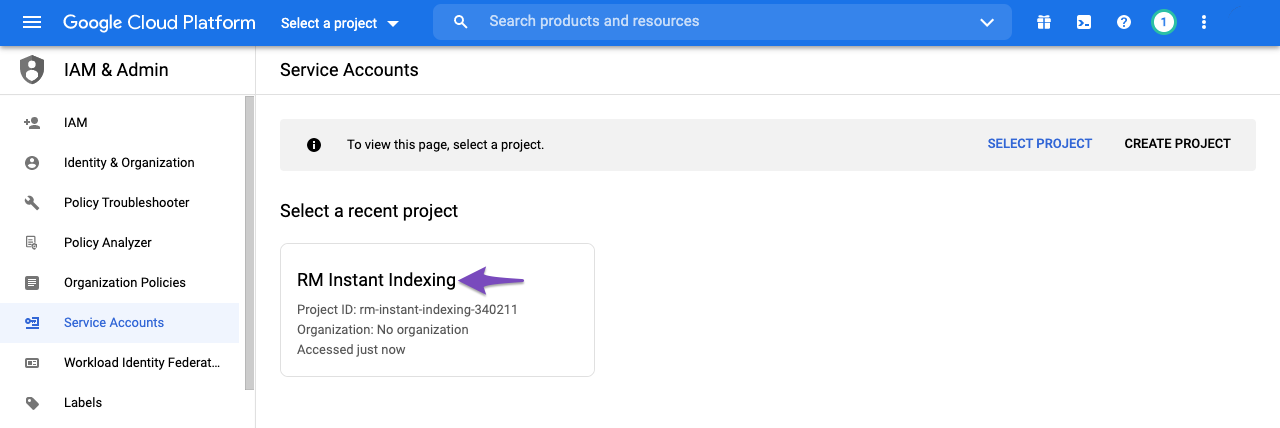
Next, you need to create a service account by opening the service accounts page.
2.1. Select the Project
You will first be prompted to select the API project you wish to create this service account in (the one created in the previous step).
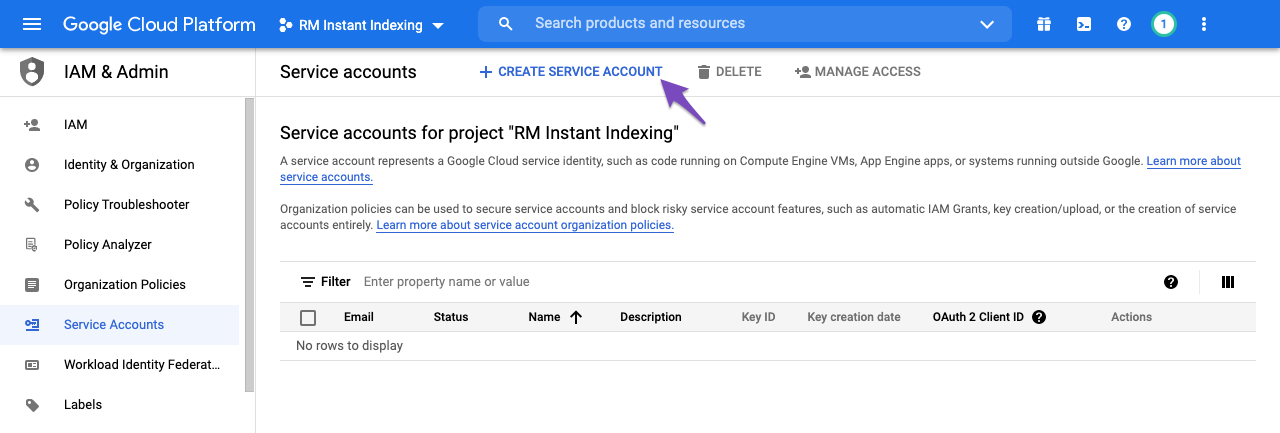
2.2. Create Service Account
After selecting the project you wish to create a service account for, you’ll be taken to the following page, where you simply need to click the Create Service Account button highlighted below:
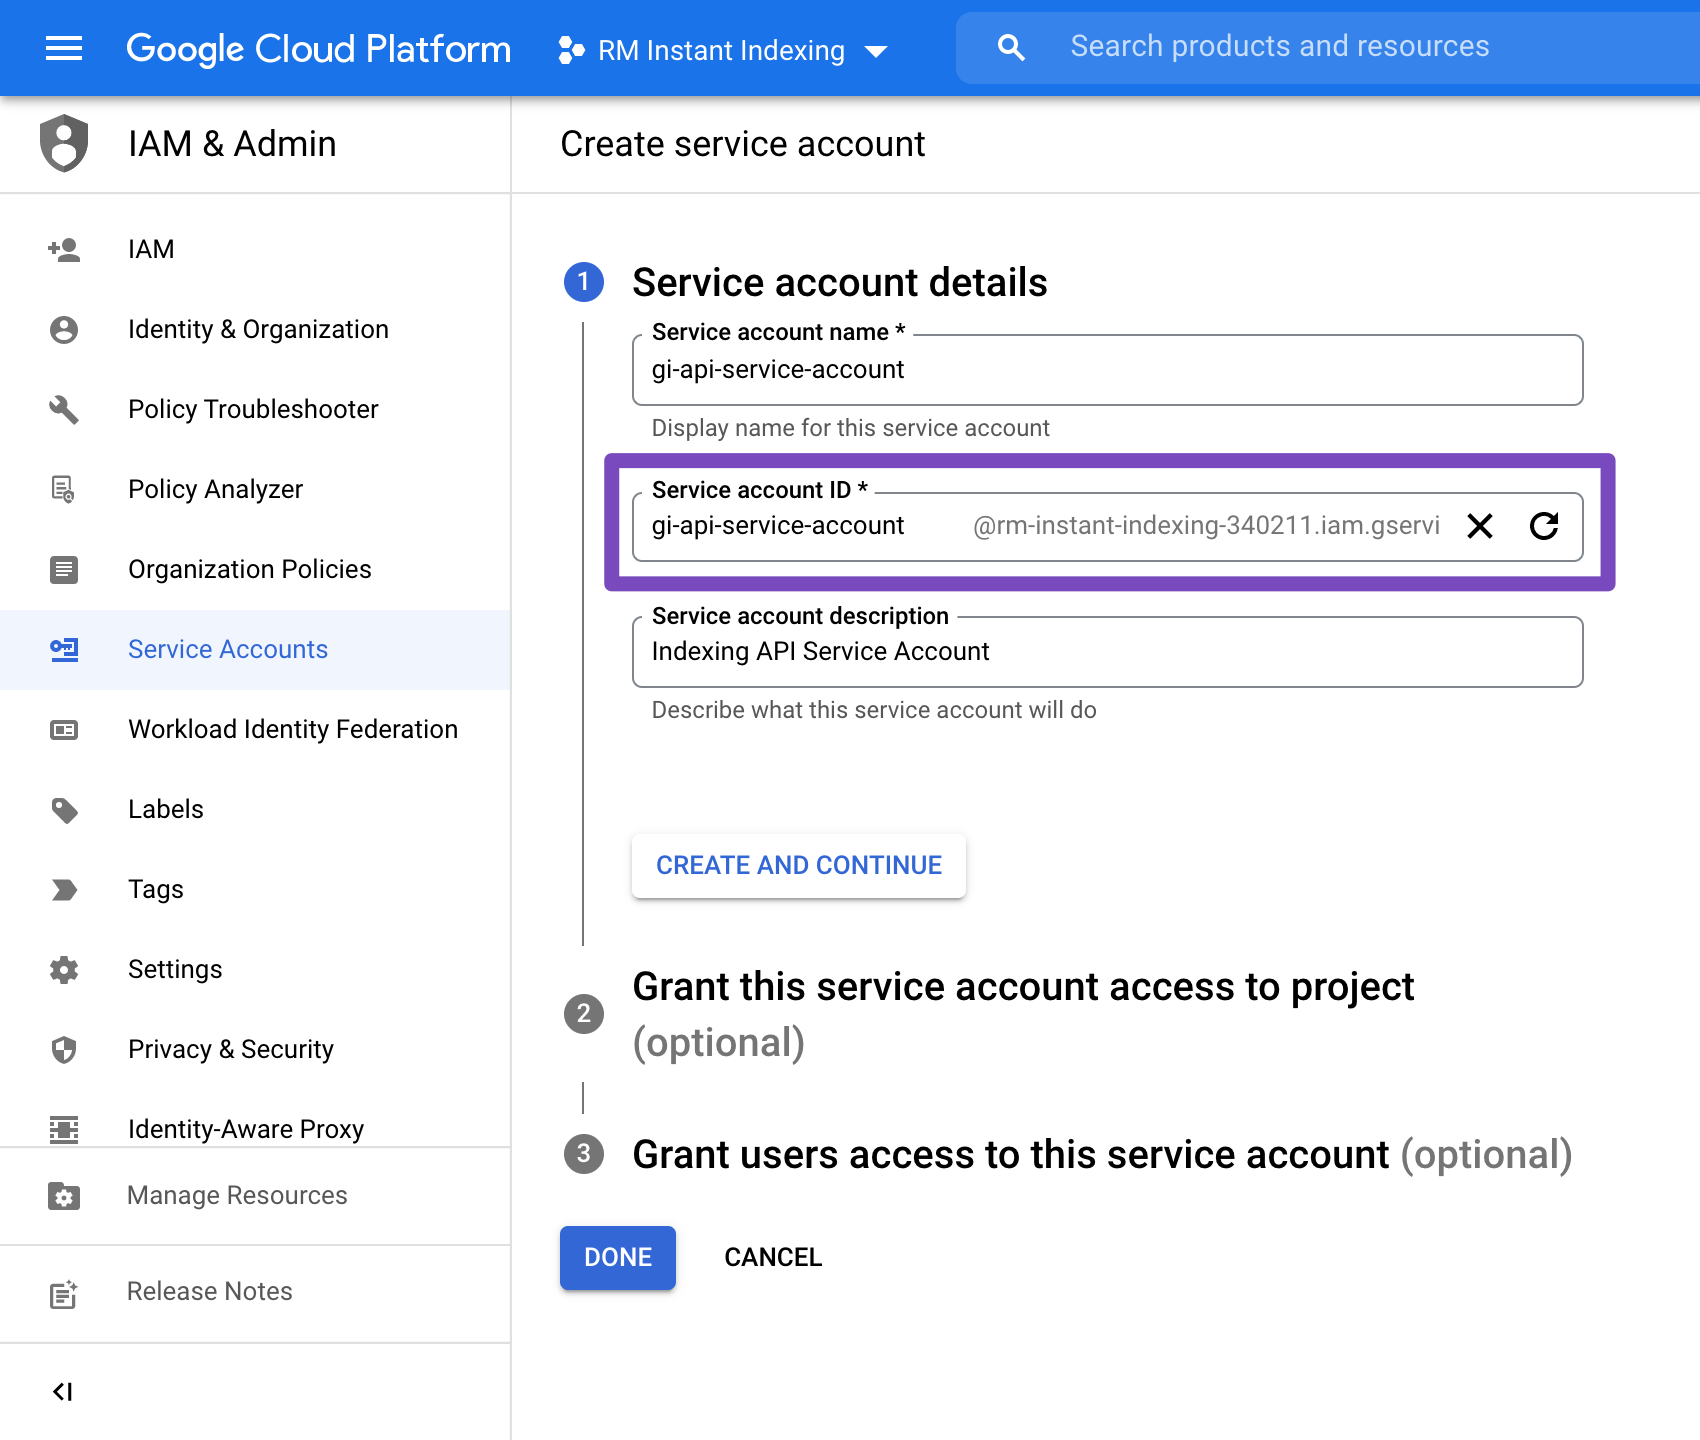
On the Create service account screen, enter a name and description for the newly created service account.
Select and copy the whole Service Account ID (the one that looks like an email address) because you will need it later. Then, click on the Done button at the bottom:
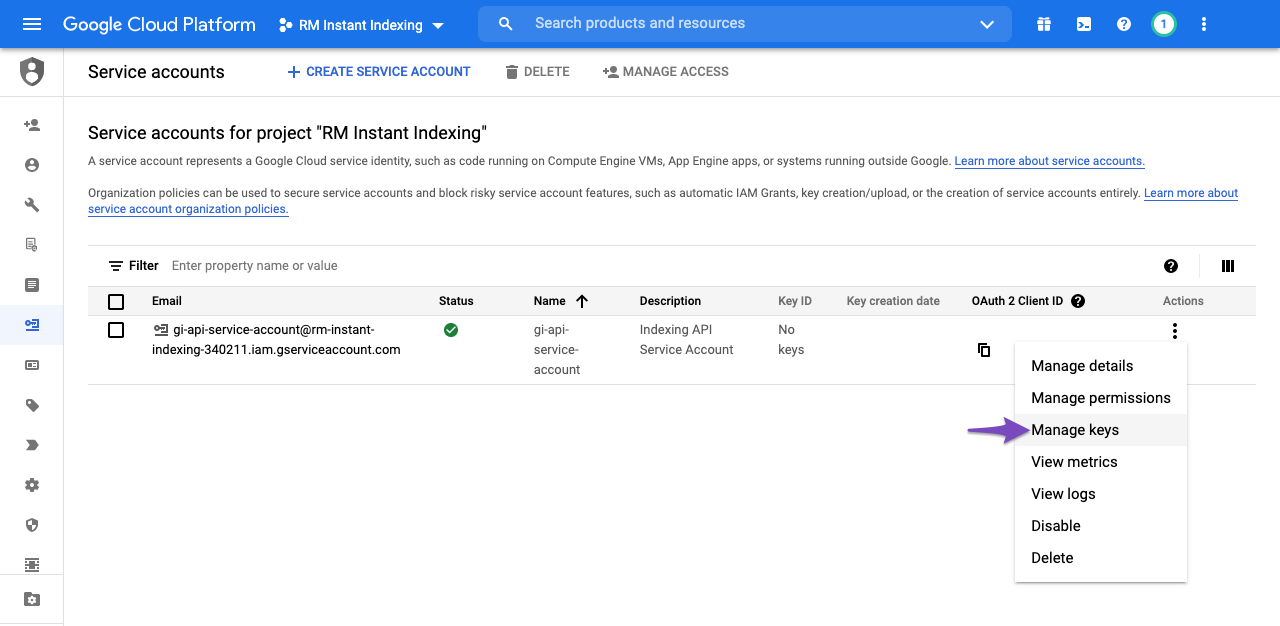
2.3. Manage Keys for Service Account
You will then be able to download the file that contains your API key. To do so, simply click the three vertical dots in the Actions column, and then select Manage keys as shown below:
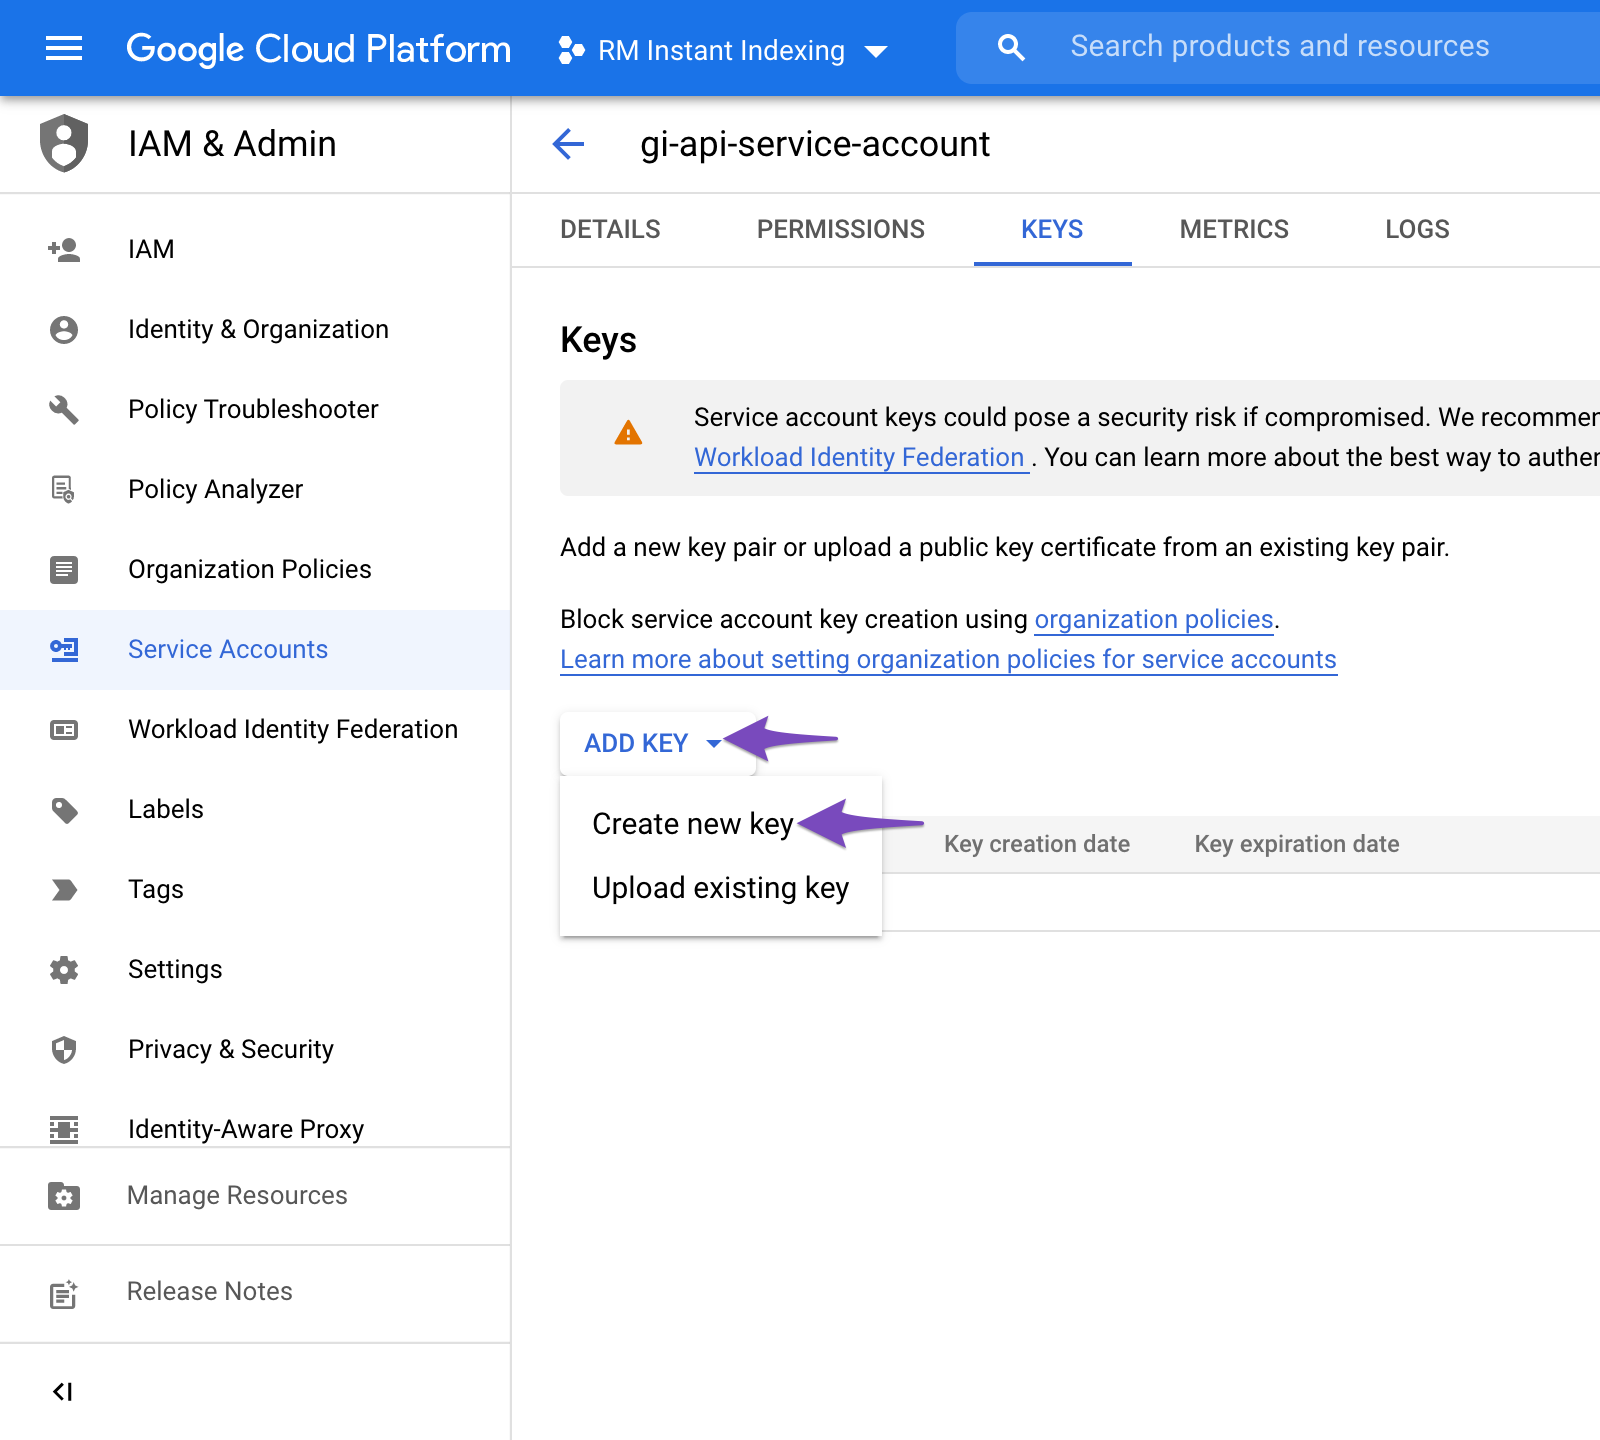
2.4. Create New JSON Key for Service Account
You will then be taken to the following page where you can click Add Key and then select the Create new key option, as shown below:
Choose the default JSON format when prompted in the overlay, and click Create:
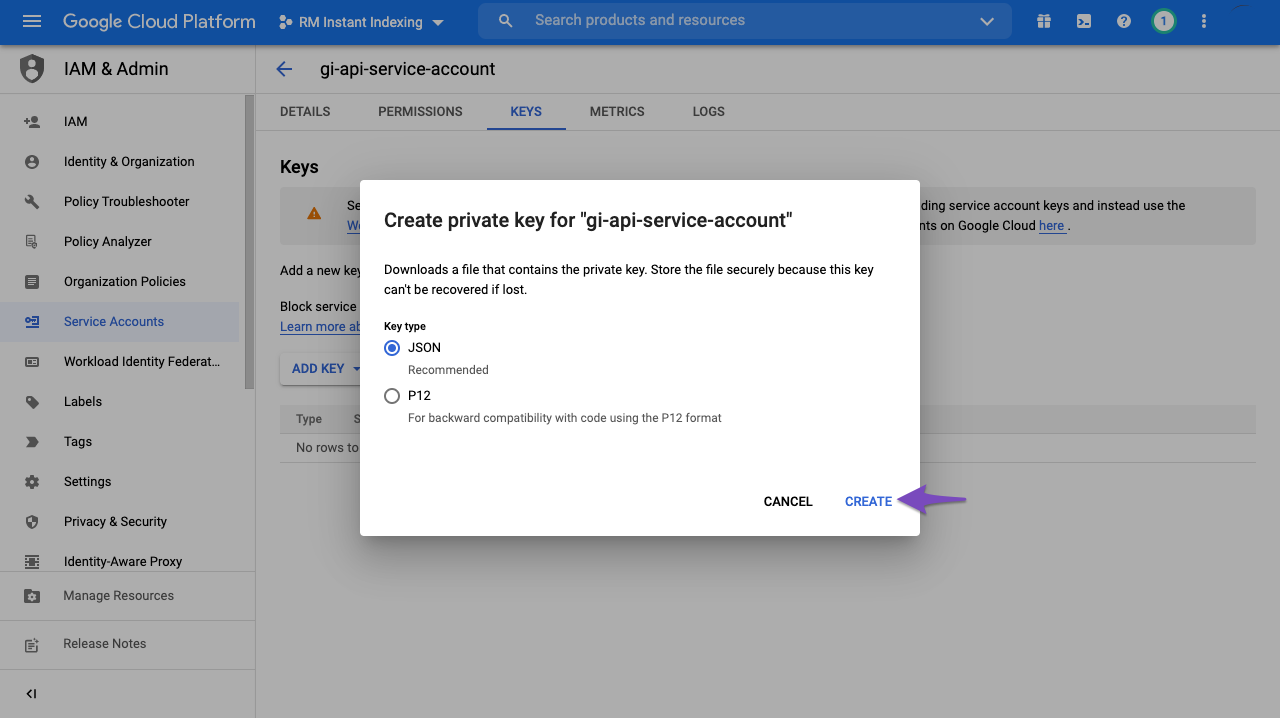
Upon clicking Create, the .json file will be automatically downloaded in your browser, meaning you’ve successfully created the API key & can proceed to the next step…
3. Add the Service Account as an Owner of Your Google Search Console Property
To do this, you’ll need to register and verify your website with the Google Search Console (if you haven’t done so already), which is super easy: just follow the recommended steps to verify ownership of your property.
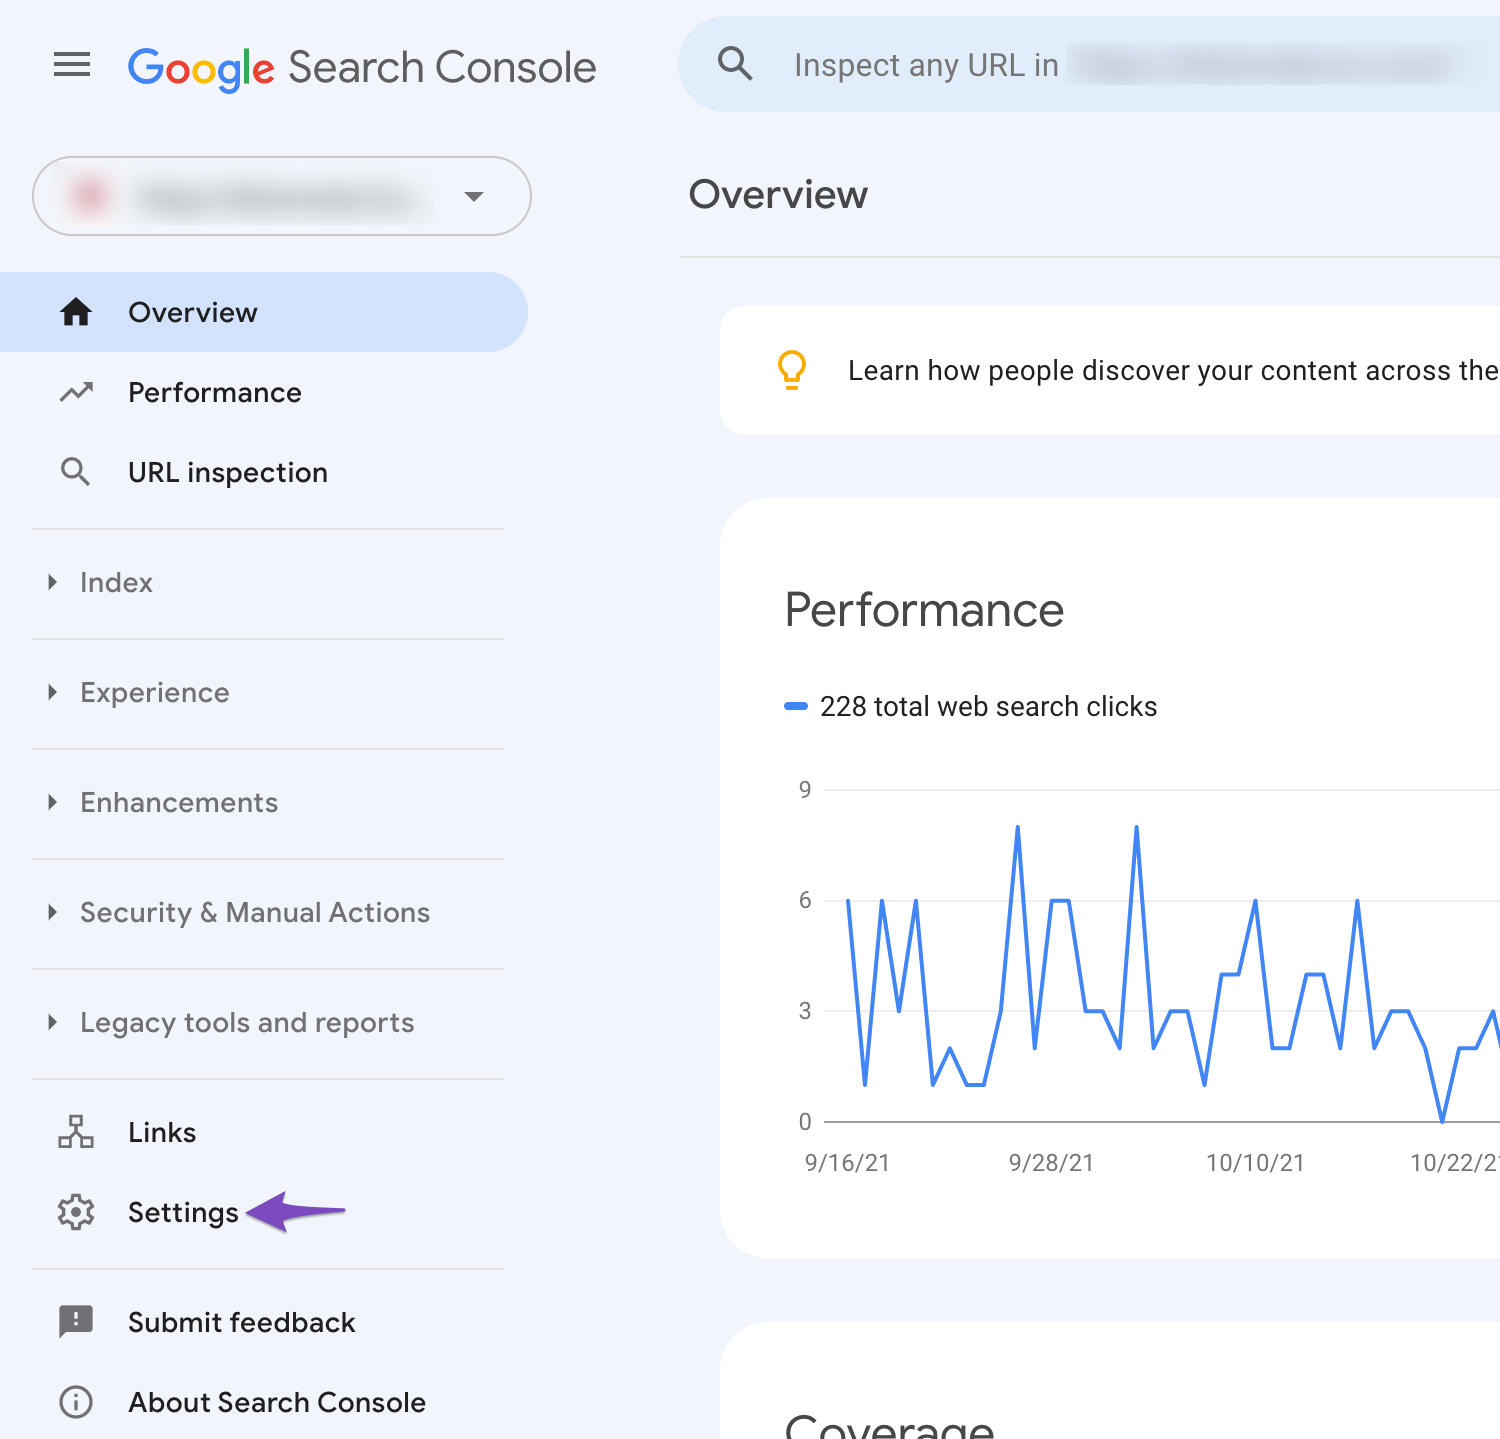
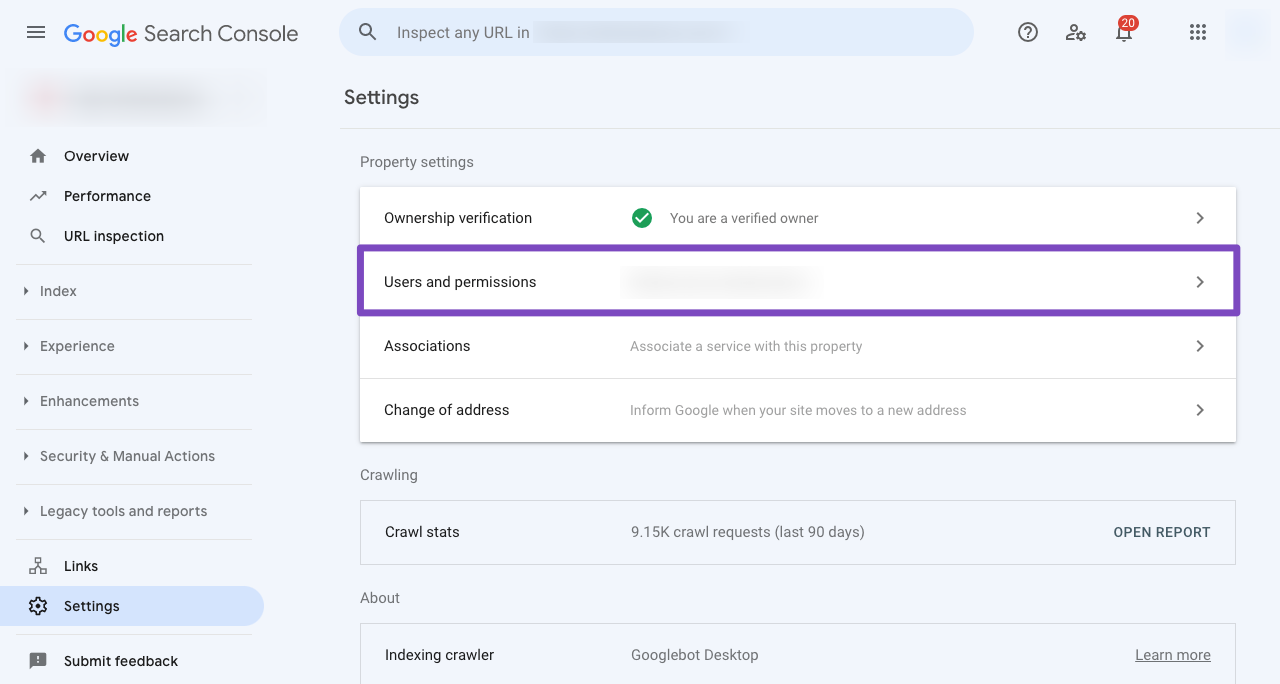
3.1. Navigate to Users and Permissions in Google Search Console Settings
After verifying your property, open the Google Search Console, select your property on the left (if prompted), and then click on Settings near the bottom:
Click on Users and Permissions:
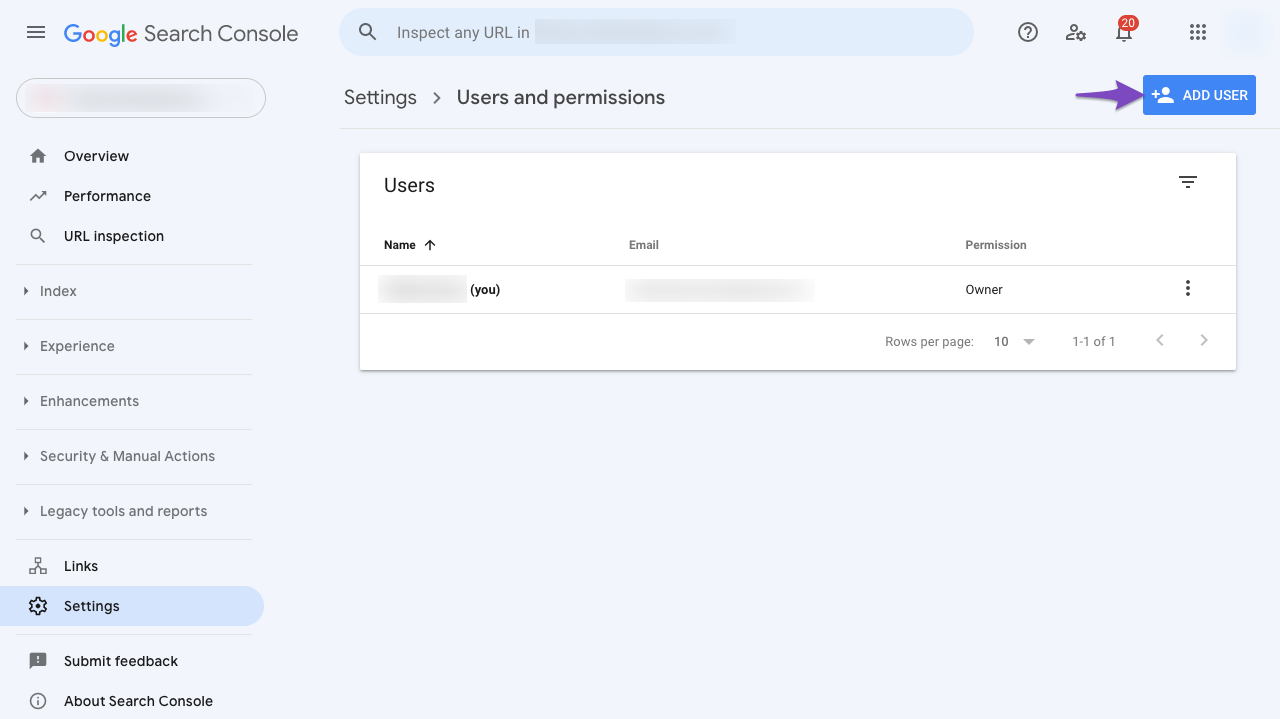
3.2. Add User to Your Search Console Property
Click on the three dots next to your account, and then click on Add User.
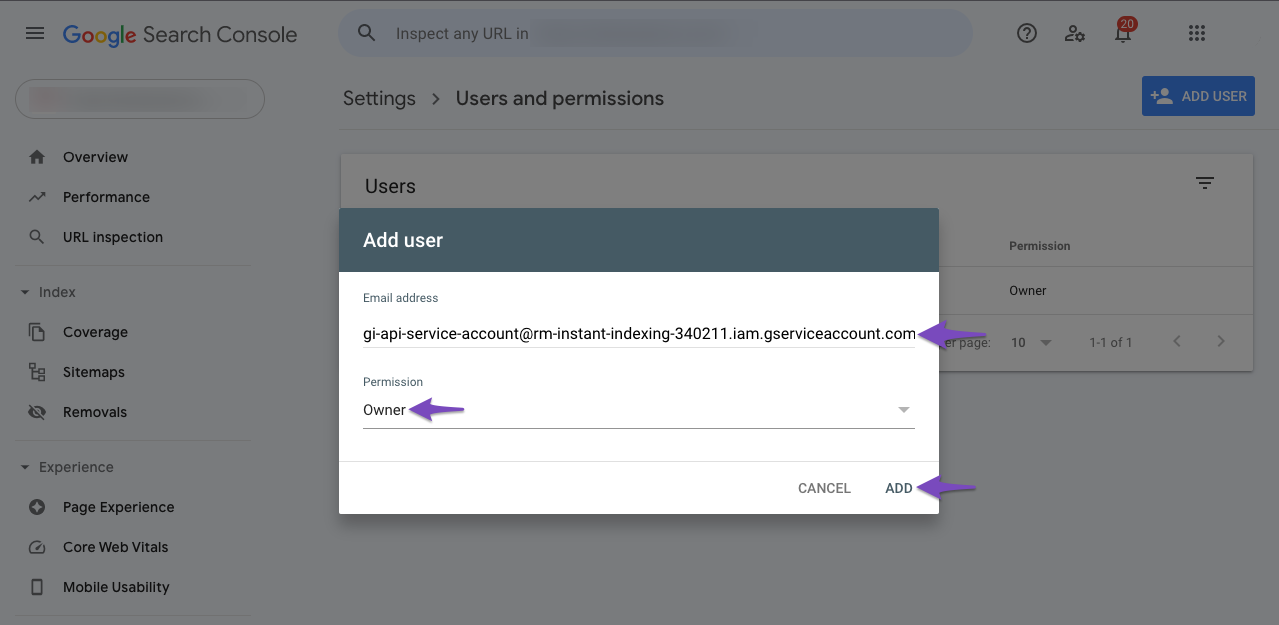
3.3. Delegate Service Account ID as Owner
A popup will now appear. Enter the Service account ID (the one you copied out earlier) in the Email address field. Ensure that you’ve provided Owner level Permission, and then click Add.
Now in a few moments, you should see the Service account listed as a new Owner.
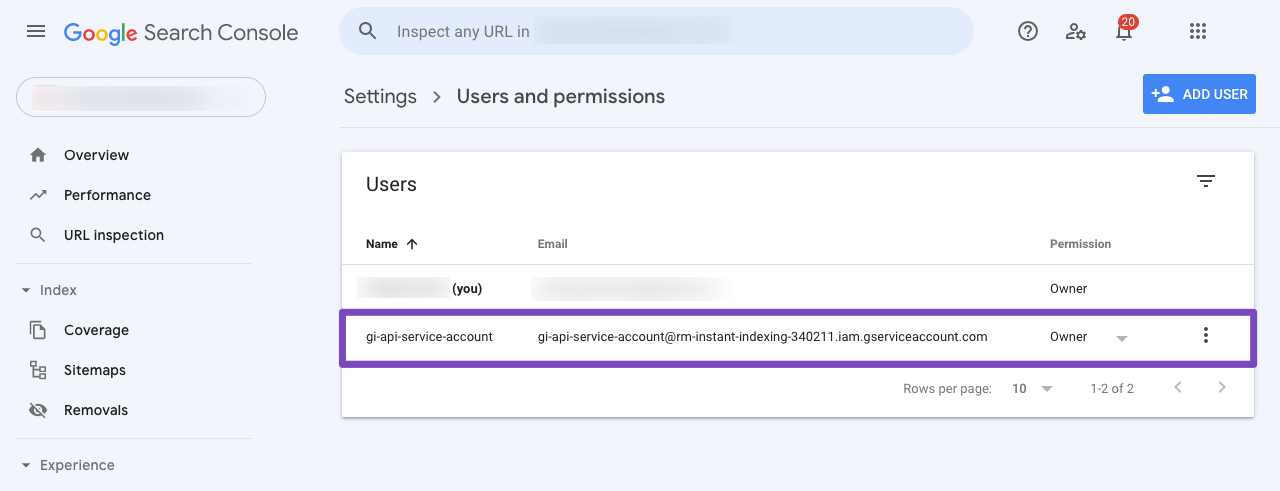
You can use a single Project, Service Account, and JSON API Key across multiple sites, just make sure that the Service Account is added as Owner for all the sites in the Search Console.
4. Insert Downloaded Google API JSON Key into dashboard or plugin
Copy or upload Google API JSON Key where it's required.
